Standard walkthrough
Set up your home currency and trip, calculate a purchase and explore the core tools available to every user.
Quick walkthroughs
See the complete journey from setting up a trip to saving purchases, sharing costs and settling balances.
Set up your home currency and trip, calculate a purchase and explore the core tools available to every user.
See budgets, unlimited transactions, custom categories, transaction editing and Shared Trip tools in action.
Shared Trips • Pro
From creating the trip to settling the final balance, these six steps keep group spending clear.
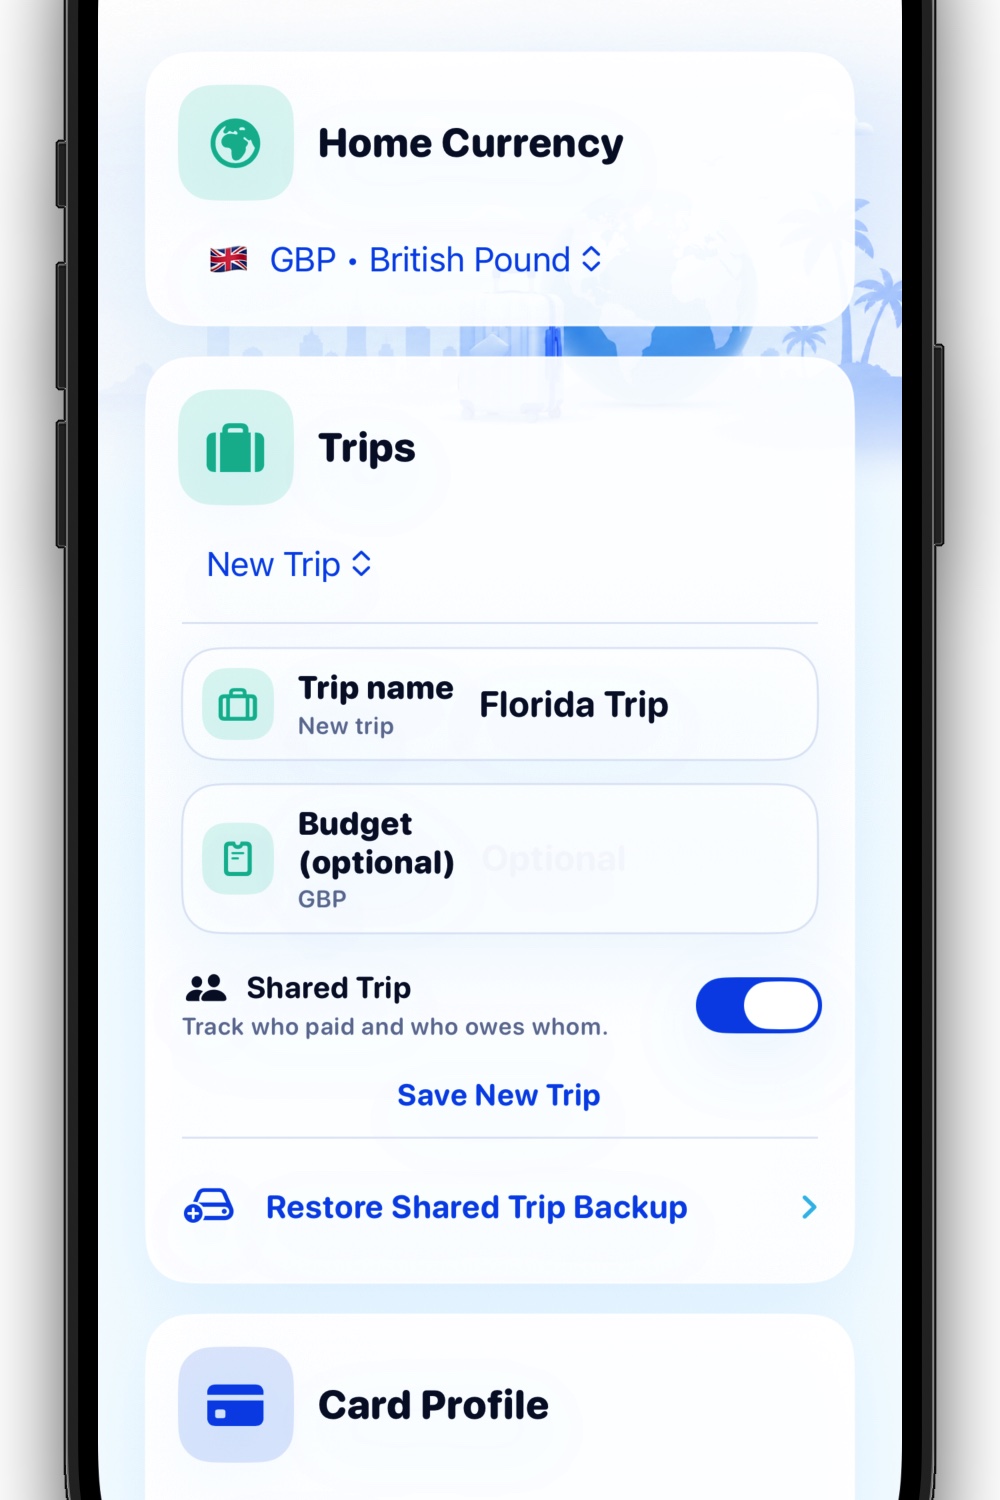
Open Setup, find Trips and choose Add Trip. Enter the trip name, switch on Shared Trip and save it.
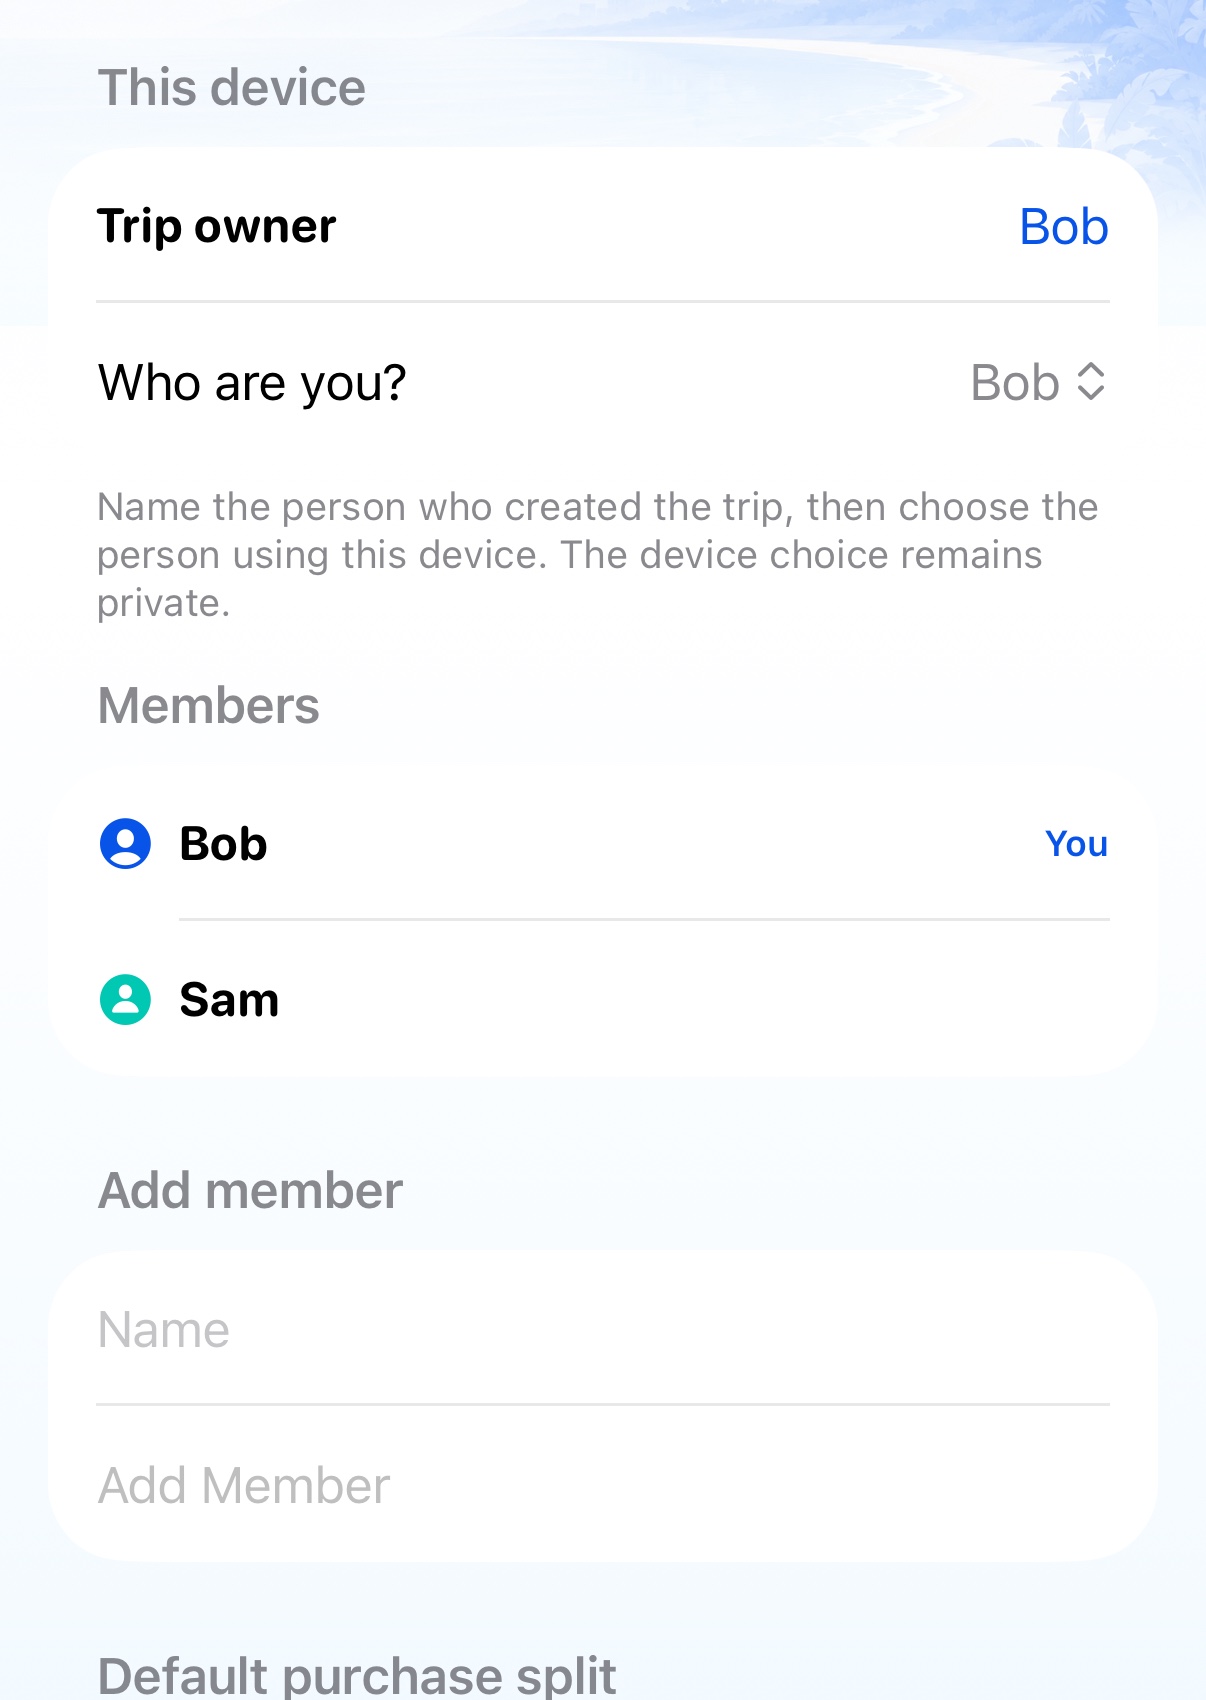
Open Edit Trip, name the trip owner and add everyone travelling. Choose an equal split, or set custom percentages for the group's usual arrangement. You can override this for an individual purchase later.
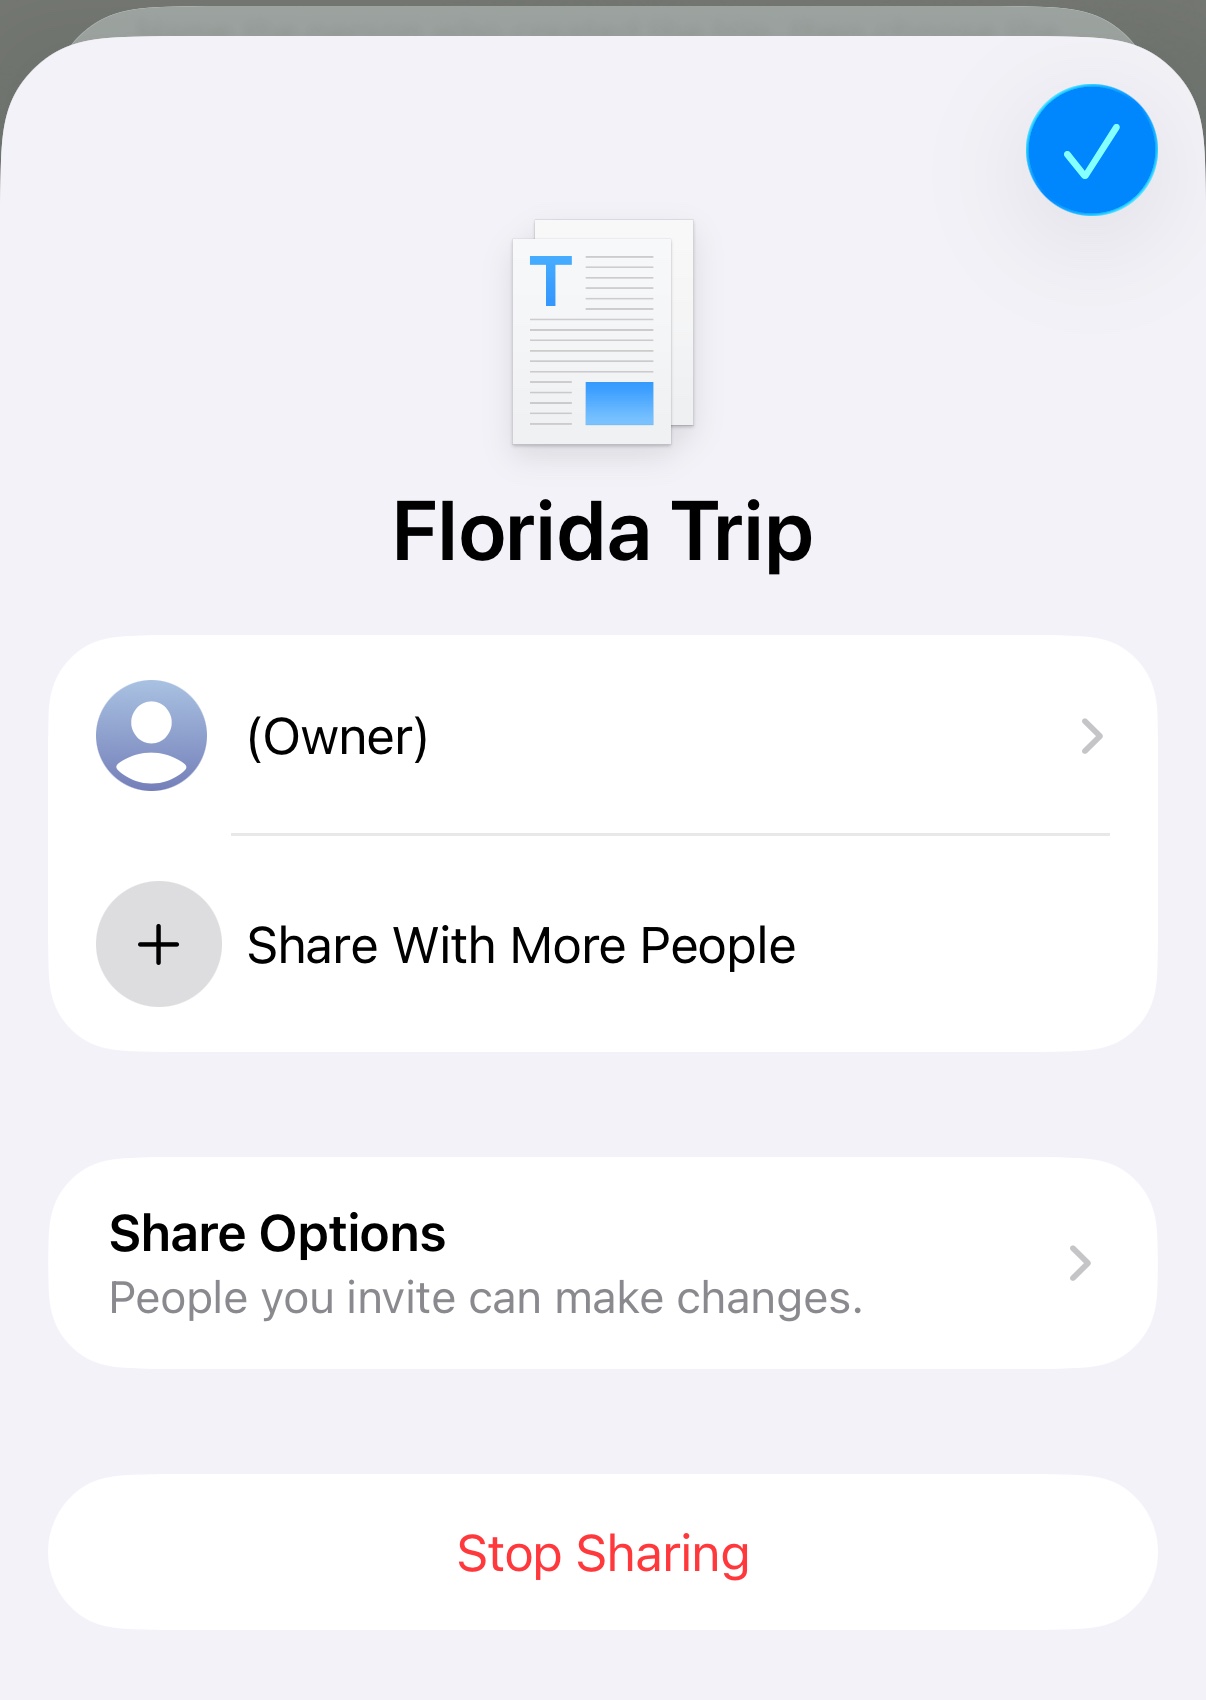
Choose Manage Sharing, then share the iCloud invitation. Each invited person opens the link on their iPhone or iPad signed in to iCloud and accepts the Shared Trip.
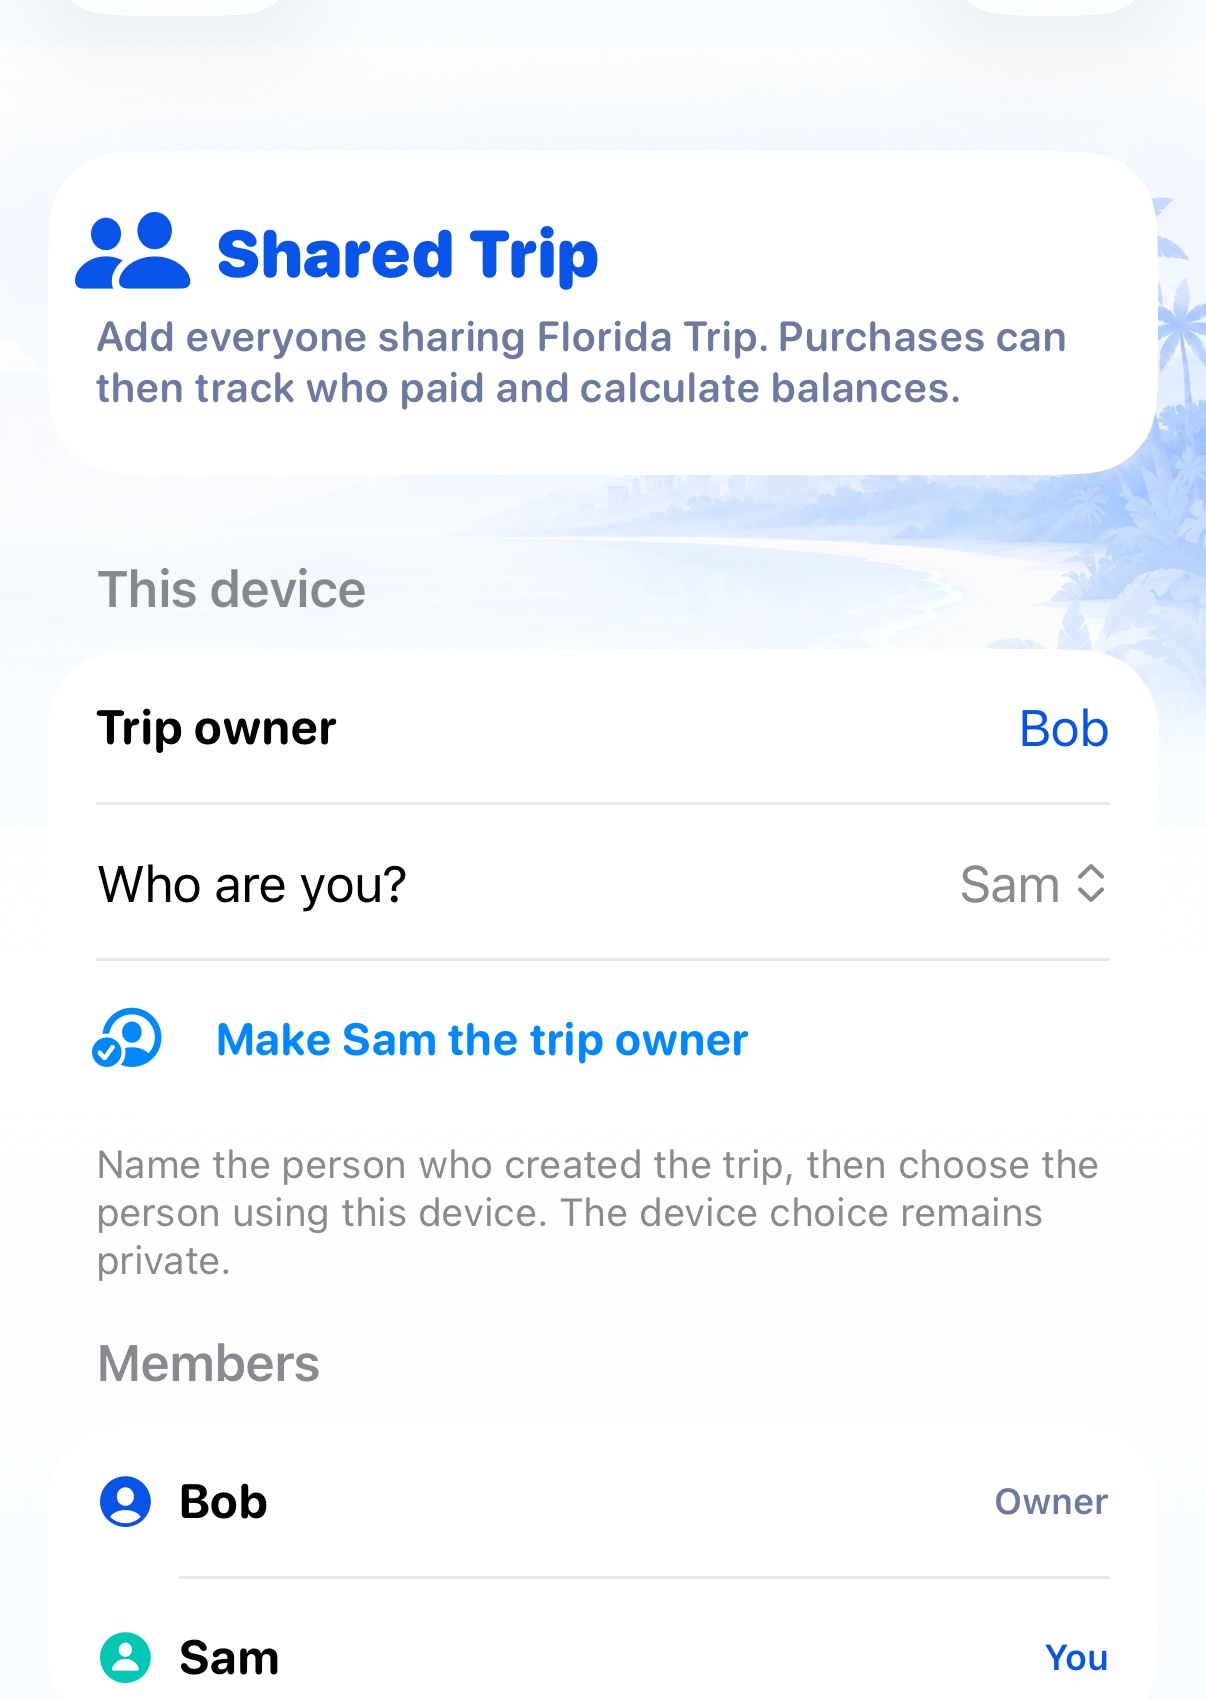
On the invited person’s phone, open the Shared Trip in Setup. Under Who are you?, they must select their own name from the member list and save. This links that device to the correct traveller for purchases, balances and notifications.
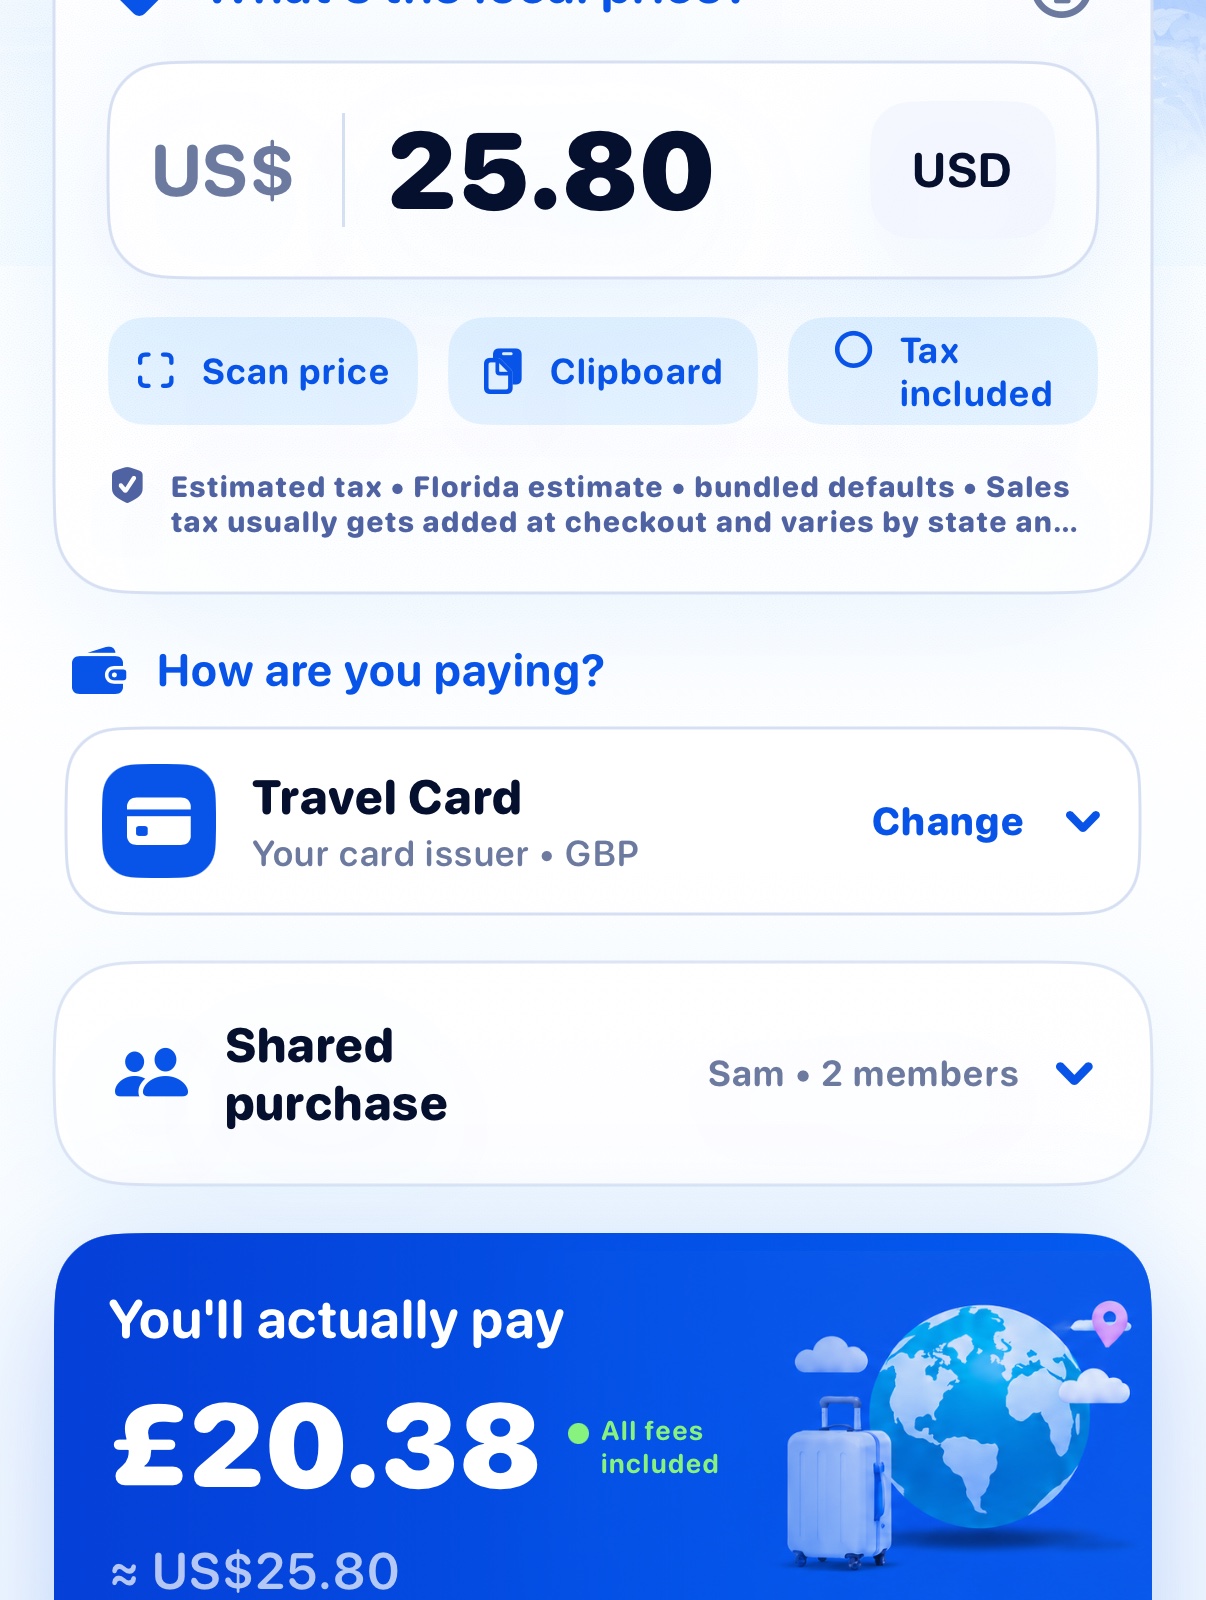
On the Main screen, open Shared purchase. Select who paid, choose the members sharing the cost, and use the trip default, an equal split or a custom split before saving.
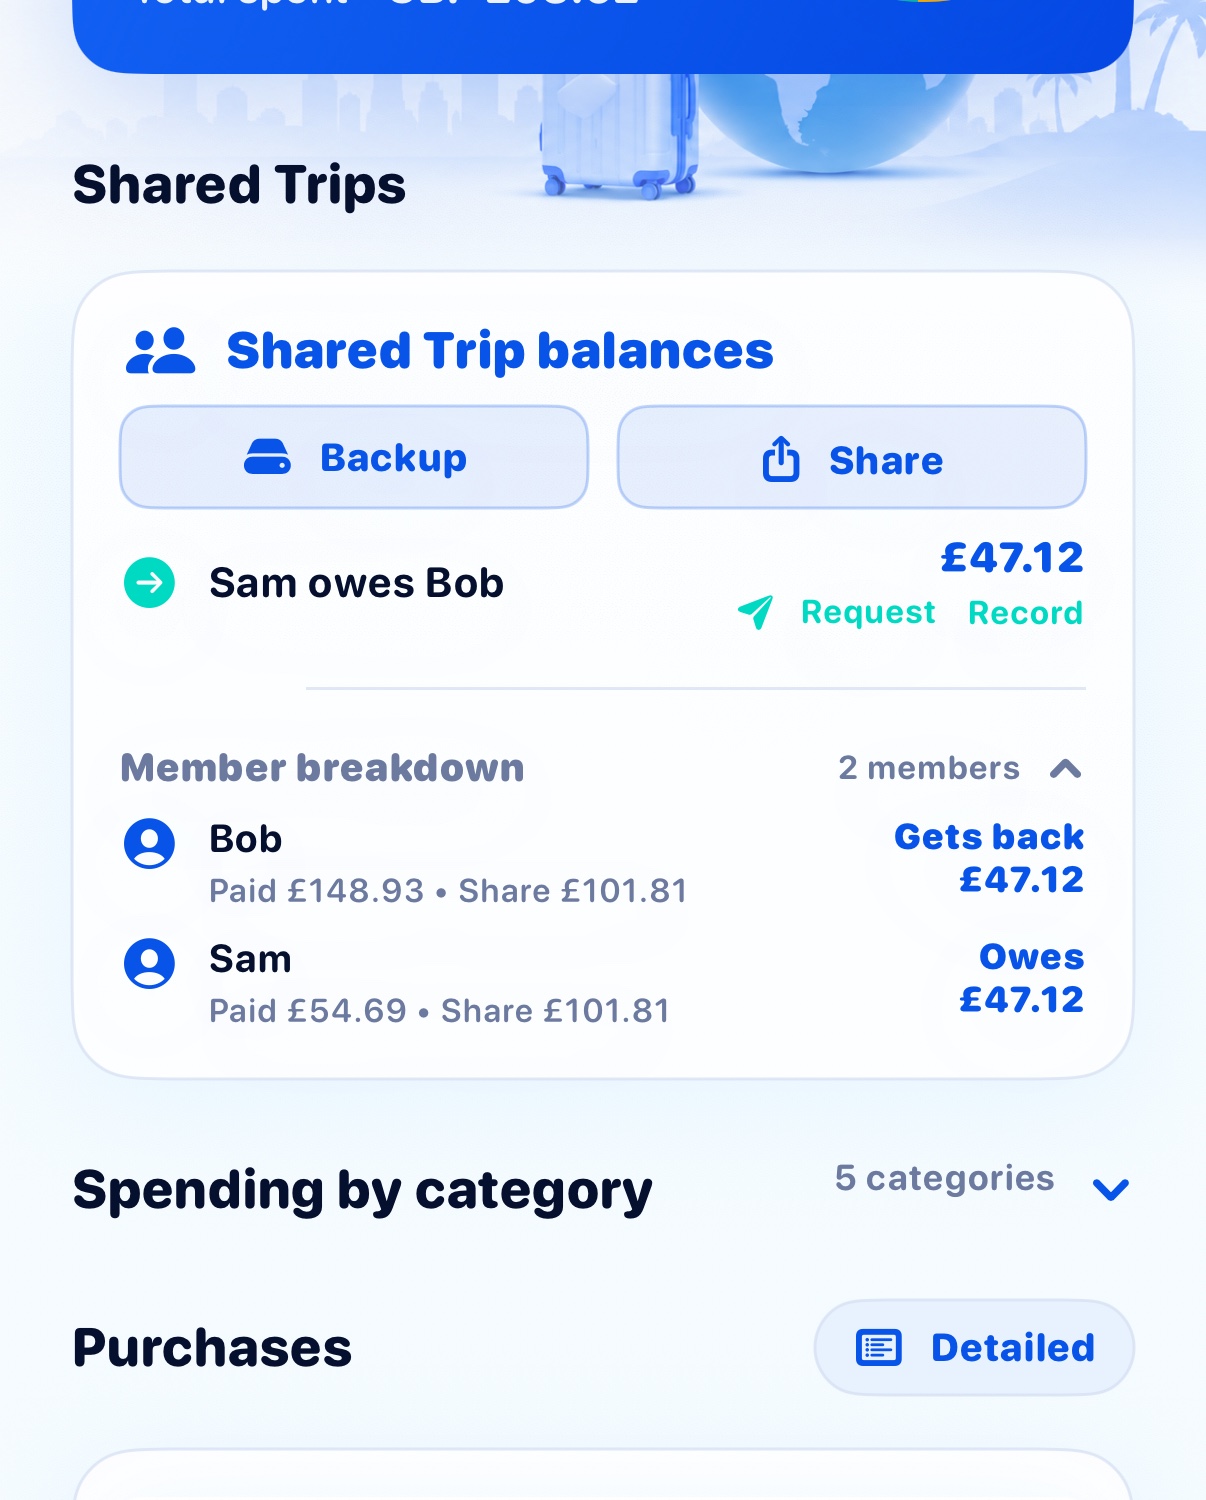
Open History and scroll to Shared Trips. The app shows who owes whom and each member's share. Use Record repayment as people settle up, and share the balance summary with the group.
Shared Trips FAQ
Quick answers covering iCloud, privacy, members, balances and troubleshooting.
Each person needs How Much Travel on an iPhone or iPad, an active iCloud account signed in on that device, iCloud Drive enabled and an internet connection for invitations and syncing. iCloud access must not be restricted by Screen Time or device management. Creating and managing a Shared Trip is a Pro feature.
The trip is stored by CloudKit in the owner’s private iCloud database and made available through Apple’s iCloud sharing system only to accepted participants. Permissions are controlled by the iCloud share. Apple encrypts third-party iCloud app data in transit and on its servers.
“Me” is the temporary member used when the person on a device has not yet identified themselves. Open the trip in Setup, choose Edit Trip, select the correct person under Who are you?, then save. See Step 4 above.
Open Setup, find the trip, choose Edit Trip, change its name and save. Accepted members have permission to update shared data in the current version, so agree the new name with the group. The iCloud owner remains responsible for invitations and deleting the trip for everyone.
The iCloud share owner manages participants. On the owner’s device, open Setup → Manage Sharing and use Apple’s sharing screen to invite or remove people.
No. Each traveller should use their own active iCloud account. The owner sends an invitation and each person accepts it while signed in to the account intended for that device.
No sensitive card details are shared. Your own device can show the card profile you used, while another member’s device displays a privacy-safe description such as Sam’s card or Sam’s cash.
No. Record repayment records that money was settled and updates the balances; it does not initiate a bank or card payment. The Request action helps you send the amount using a compatible app.
You can continue viewing locally saved information. An internet connection is required to accept invitations and exchange updates through iCloud. When service returns, reopen the app and allow iCloud a moment to refresh before making conflicting changes.
Notifications are optional. Turn them on under Manage Sharing to receive alerts when another member adds a purchase shared with you or records a repayment to you. Notification permission must also be enabled for How Much Travel in iPhone Settings.
A participant who did not create the iCloud share can remove the trip from that device without deleting it for everyone. Existing saved purchases remain in History. Only the iCloud share owner can delete the Shared Trip for all participants.
No. A normal App Store update keeps Shared Trips, members, transactions, repayments and sharing links in place. Deleting the app or its iCloud data is different, so make a backup before doing either.
Open History, scroll to Shared Trip balances and choose Backup. Store the backup file somewhere safe. Use Restore Shared Trip Backup in Setup if you need it later.
Check that the invited device is online, signed in to iCloud, has iCloud Drive enabled and has the latest version of How Much Travel. Open the invitation on the intended device, wait briefly for iCloud to prepare the share, then try the link again. If necessary, ask the owner to remove and re-invite that person.
Send a message and include the screen or step where you got stuck.